Showing posts with label tutorial. Show all posts

Monday, December 28, 2015

The Conversation Starter {A Penny Floor Tutorial}


Your front entrance is a reflection of you.  Ours invites you to give us your thoughts...And - we might even give you a penny for them. What does yours say?

The first time I told Huz I wanted a penny floor, I was totally shut down.  So we pursued other options. An entryway floor takes a beating - so it had to be something that held up well, could take some water (hello snow boots melting all over the floor), looked good with brick, and could be laid over a cement floor.  After a lot of shopping he decided maybe this wasn't such a bad idea after all!

I did a lot of research before we started. When Huz started coming around to liking this idea, I needed to have a plan! I talked to flooring experts, construction guru's and anybody who had ever heard of a penny-embellished anything.  Some people looked at me like I had horns growing out of my head while others were intrigued.   After a lot of talking about pros and cons (we had never tiled anything before), he decided we would try the penny floor.  

Yes, yes, yes!  

This is what we came up with for a supply list:

  • PL 400 construction adhesive
  • Caulk gun
  • 1/16th" trowel
  • A LOT of Pennies 
  • Polyurethane (we used a matte finish)
  • Paint brush

We started things off with PL 400 adhesive.  Draw a couple lines of it out of the tube spaced a couple inches apart and spread it with a trowel.  We advise working in a 12"x12" space at a time. Huz drew a line on the floor a foot from the wall for a frame of reference.  You don't want the wet adhesive to dry before you set your pennies in place. You may also need a break after you get a square foot done.  Or your kneecaps may be ready to fall off.  (His words, not mine).

We laid our pennies right up next to each other - not leaving any space between them.  If you want to grout between your pennies after they are laid you can leave bigger spaces or create designs.  Here is a close-up of ours. We used a staggered pattern. We chose not to go all new, or all heads up, or anything like that.  The pattern with colors of pennies was random.  We like the mix of dirty, bright and everything in between.

Once you get started make sure you have some talented help around to take the wrappers off the pennies.  This is an important and time-consuming job.  You can't lay pennies that are still wrapped in paper.  But you CAN unwrap them while you're watching football. This is a perfectly good reason to let your kids watch TV. Free labor + no complaints. Sounds like a win to me.

Midway through our project we ran into a snafu with our pennies.  We got a $200 batch and they were all brand-new 2015 pennies.  Bright and shiny.  So I set out doing more research and figured out how to age them.  I put some in bleach.  This brings out the blue color.  I put some in vinegar - this blackened them. I also put some in salt. These didn't yield as quick of results so I'd stick with bleach or vinegar if you need to discolor pennies. This was slow-going so we also went back to the bank to get more while keeping the shiny ones until we were done. This meant we unwrapped a lot more pennies than we actually used, but the show had to go on!
 
Here is Huz making good use of time at one of my handmade markets - unwrapping pennies while I work my booth.  He is the muscles behind every booth setup and tear down.  I love how supportive he is.  All that and good looks too.  What a lucky girl I am!

Once you finally finish adhering all the pennies, it's time to apply the sealant. Brush this on evenly.  We did three coats to adequately fill in the gaps between the pennies.

Make sure you allow this to fully dry in between coats.  We waited about 24 hours between applications and used a fan to assist drying. A boat flotation cushion works well to kneel on.  Oh, and if you do this in the winter like we did, we highly recommend opening your windows for ventilation. It gets chilly but the sealer is really strong-smelling.

Huz insisted on laying all the pennies himself.  It ended up being about 250 square feet. My job was to keep him well supplied on homemade pies. What a deal!  I'm thrilled with how it turned out.  *swoon*


50,000 pennies: $500
Adhesive + sealer: $150
Labor (88 hours): PRICELESS

The largest cost of this project is the time investment.  Its truly a labor of love. If you have covered anything in pennies, I'd love to see it!  


Monday, January 12, 2015

Smittens: A Sweater to Mittens Tutorial


Supplies
1-2 Sweaters
1/4 yard fleece fabric for lining
Seam allowance is 1/4”
Mitten Pattern

1. Cut 2 of sweater fabric for each piece and 2 of lining for each piece. Also cut cuffs off sweater allowing 1/2" for seam allowance.

2. Pin top and bottom of hand piece #2 and #3 sewing to notch on thumb side, as shown. I cut my notches off and just mark them with a fabric marker and sew to the pin.
 

3. Flip front open and pin back to front.  Stitch all the way around the mitten.  Stitch up to thumb seam from both sides leaving thumb free. 


4. Repeat sewing assembly for lining pieces. Sew cuff to lining.


5. Place lining inside mitten.  Fold cuff over and stitch in the ditch on side seams.


6. Hand sew button(s) on.


Now go make another pair and give a sweater a new life as smittens!

Friday, October 26, 2012

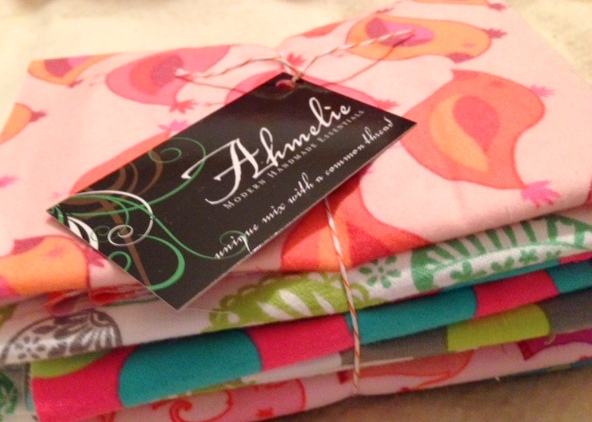
Scrap Happy #Giveaway {Fabulous Fabric Friday}


Happy Friday! This week I want to share a pile of fabric scraps and an inspiration project with you. Now doesn't this little ruffled gift card holder just make you want to giggle cause its so cute and would be uber fun to pull out of your handbag every time you step up to the register?!  You can also use it for cash or credit cards so its got plenty of uses. Freespirit fabrics has posted a tutorial on how to make this on their blog. I fell in love with these and yes, they definitely got pinned on my "Patchies & Using up Scraps" board!

Do you have a stock pile of cute scraps that you want to sew up into piles of gifts for all your loved ones?  Well if you don't, I do! I think these will do the trick nicely.

It snowed yesterday in Minnesota for the first time this fall.  While I'm not ready to give up wearing my flip-flops just yet, I am definitely in my vesting stage.  Yes this is when you wear your vest, no gloves and sandals and pretend its warmer outside than it really is.  Then you stay inside as much as possible and find cool projects to sew!  

Now all you have to do to get this stack of 12 fabrics is leave comments below of what you'd make with this sweet stack and share this giveaway with your friends.  Easy Peasy!
For extra entries you can:
Follow me on Facebook
Share this giveaway on Facebook 
Follow me on Twitter
Share this giveaway on Twitter 
Follow my blog 
Follow me on Pinterest
Share this giveaway on Google +
Pin this giveaway or your fav fabric from my shop on Pinterest
Sign up for my newsletter (see sign up box on page footer) 

Please leave one post for each entry. Can't wait to hear all your ideas!   Entries accepted until Tuesday at midnight.  Winner drawn Wednesday. Open to US and Canada.


Wednesday, May 9, 2012

{What I Worked on Wednesday} Bug Catcher

With a houseful of boys, we are often in need of a bug or critter catcher.  I've made two of these simple netted wonders this week for Owen.  Good thing I have an abundance of wire hangers and netting fabric.  Who knows where the first one went.  I think the neighborhood dogs might have wanted one of their own!  :)
Start by reshaping the body of your wire hanger into a circle and straightening hook of the hanger into the handle.  

Next cut your netting or fabric.  I made mine 16" long and about 32" wide.  Note that you should measure around the circle of your hanger to get the correct width and add an inch for your seam allowance.
Fold the top inch of netting over the hanger to make a casing.  You will be sewing the hanger right into the casing.  I use a zig zag stitch as this is very forgiving and will "give" a bit if it gets stretched by the bug catcher without tearing.  Make sure to back tack at the beginning and end.  Your netting should be hanging from the ring of the bug catcher when you're done.

Next is the side seam.  I started down about 2-3" from the top ring on the side seam.  Sew at a 1/2" seam allowance to the bottom.  

Last, bunch the bottom up and sew across it several times for added durability.  

And that's it, time to catch some bugs!

What are you working on today?


Saturday, March 17, 2012

Potholders with a Punch 101 {Bermuda Triangle Potholder Tutorial #1}


So in February I did my fabric destash and studio clean up.  It felt sooooo good!  I cleared new space in my studio, donated some fabric to worthy causes (for me this is school, daycare, church or my nieces) and did a little organizing and catch up on projects.  It always feels good to do some spring cleaning and I've made leaps and bounds in the last 30 days.  This month I get to share some of my projects I made with my stash.  So, strap on your flip flops (its 80 degrees here so flip flops are NOT optional) cause fabric is about to start flying!


The first potholder I'm going to show you is the Bermuda Triangle.  This style shows off up to 4 fun prints.  Go gather your scraps, some heat resistant quilted backing and your scissors and pins for this project.


Start with cutting 4 squares all the same size of your front fabric and cut one square in the same size of the heat resistant quilted fabric for the backing.  The block can range in size from 8-10" square. I made mine 9" square.  


Fold the front fabric square into a diagonal, matching corners and press well. Repeat this with each front square.


Layer pressed triangles on top of each other into square.  When you are finished it should look like this.
Put heat resistant quilted backing on top of this square with pretty sides together and pin. If you want to add a tab to hang the potholder, pin this in one corner before stitching the front to the back.  Leave an opening so you can turn this right side out.  Stitch with 1/4" seams, back tacking at the beginning and end.  Don't forget to leave the hole!
Clip corners at an angle to remove bulk, be careful not to cut into the seam. Turn right side out. Top stitch outside edge, sewing opening shut where you turned it right side out.  I also top stitched around edges of triangles in the center for extra durability.


All done and ready to use or give as a gift.  Hope you enjoyed this quick little tutorial and you pack your potholders with a punch!

Sunday, February 26, 2012

Handmade Gifts in No Time {Ruffled Towel Tutorial}

Do you ever need a quick gift and want that handmade touch, but have a large to-do list to knock out at nap time?  No problem! You may know that I've been trying to de-stash my fabric stash this month and so far I think its working.  This project was made with leftover scraps.  These are quick and can be done in about 3-4 minutes per towel if you use a ruffle accessory foot on your sewing machine.  Here we go!


Cut 4" x 44" wide strip of fabric.  Iron down 1/2" from the front to the back on the top and bottom edges the entire length of the fabric.

Run the top and bottom edges through the accessory foot ruffler.  
Don't you just love this sweet little tool? That was less than a minute flat!

Pin the ruffle 3" up from the bottom of the towel.  This should be plenty of ruffle length for any normal sized hand towel.  Stitch down on all four sides and cross the finish line.

I think a set of three towels with a hand pump soap tops the gift off nicely.  

I like to put them in an Izze drink 4-pack case, which I save for just such an occasion...and because I struggle to throw anything useful away.  {You should see my bottle cap collection!}
This is a cute way to display the towels and repurpose the cardboard carry case which I love.  Add a handwritten card and Voila, done.  Now back to that pile of laundry!

Thursday, October 20, 2011

Fa-la-la-la-la Fa-leece Hats for the Holidays

Tis the season to break out hats and mittens and start thinking about stocking stuffers and Christmas gifts!  This tutorial should help cross a few of the nice people off your list.  Follow these easy directions below:


1.  Cut a piece of polar fleece approximately 1/2" bigger than head measurement in width, by 16"-18" tall depending on how long you like your fringe.  Don't worry, if it's too long you can always trim it later.
 

2.  Cut one 1" by 10" strip, set aside.

3.  Fold fleece in half width-wise and stitch 1/2" seam allowance all the way from the top to the bottom of the hat lengthwise.  Don't forget to backstitch at the top and the bottom.

4.  Turn bottom edge up 2.5".  Pin, stitch edge down. I prefer to zig zag this as it stretches a bit more when its pulled over the head.  The zig zag allows for a bit of stretching where a straight stitch may break.

5.  Bunch the top about 3-4" from top of hat.  Lay strip of fleece under hat.  

6.  Tie strip in knot--double knot this.  


7.  Cut fringes 1" wide.  Trim strip to same length as fringes.  Voila, your hat is finished.  Push the "easy" button. 

Repeat and share the hat love!