Saturday, November 5, 2011

Homemade Babycakes, Betchya Can't Eat Just One...

If your kids are anything like mine you find it very hard to enter they bakery at the grocery store without leaving with some donuts in the cart.  Typical?  Yes, good.  I'm glad to know I'm not the only mom who caves in so we don't have a major meltdown between the cupcakes and the artisan bread isle.  I always opt for the donut holes so at least if I have to give in, it's a smaller serving of sugar.  A nice compromise if you ask me.

So....I was super jazzed when I saw this new babycakes product at my local department store. 
 {Yes I'm thinking, I can put whole wheat flour in these puppies and cut some of the sugar and the kids will never know!} So I picked one up with my coupon that I got for donating clothing.  What a win/win.  I give them clothes that no longer fit my kids and they give me coupons.  This is dream shopping cause I just de-stashed the closets at home {huz will be so happy} and get new fun goodness on sale {huz is not as happy about bringing stuff home, but you can't win them all, right?}  Yay for me, I say!

So Owen was very excited to try them out. He helped me mix up the batter.  We chose the Vanilla Cake Pops recipe:


1.5 cups all-purpose flour {this is where I substitute 1/3-1/2 cup for whole wheat flour, couldn't even tell so I might try more next time}
1 teaspoon baking powder
1/4 teaspoon salt
1/2 cup butter, softened
1 cup sugar {I used powdered sugar and skimped on it a bit}
2 eggs
2 teaspoons vanilla
1/2 cup milk
Cinnamon and Sugar for coating


Directions:
1. Combine flour, baking powder and salt.  Set aside.
2. In a separate bowl, beat together butter and sugar until light and creamy.  Beat in eggs and vanilla.
3. Alternately blend in flour mixture and milk into butter mixture, beginning and ending with the flour mixture.
4. fill each cooking reservoir with about 1 tablespoon of batter. {My pampered chef scooper worked great for this so my fingers didn't get so messy}
5. Bake 4-5 minutes or until a toothpick inserted into a cake pop comes out clean.
6. Allow to cool and glaze or coat, as desired.


Owen manned the baker under my supervision. I filled the reservoir with batter and he took them out with the fork tool when they were done.  {If you fill them too full they will come out looking a little bit like planets with rings around them.} We opted to roll ours in cinnamon and sugar.  Here is a picture of the finished product.  It'll be our little secret how good they actually are for you, right?

Thursday, October 20, 2011

Fa-la-la-la-la Fa-leece Hats for the Holidays

Tis the season to break out hats and mittens and start thinking about stocking stuffers and Christmas gifts!  This tutorial should help cross a few of the nice people off your list.  Follow these easy directions below:


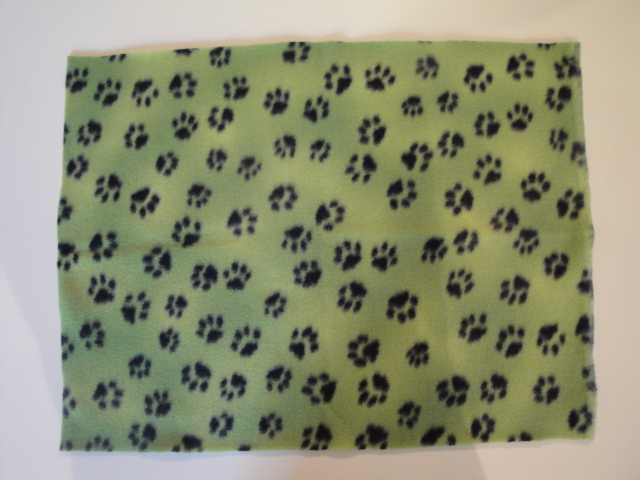
1.  Cut a piece of polar fleece approximately 1/2" bigger than head measurement in width, by 16"-18" tall depending on how long you like your fringe.  Don't worry, if it's too long you can always trim it later.
 

2.  Cut one 1" by 10" strip, set aside.

3.  Fold fleece in half width-wise and stitch 1/2" seam allowance all the way from the top to the bottom of the hat lengthwise.  Don't forget to backstitch at the top and the bottom.

4.  Turn bottom edge up 2.5".  Pin, stitch edge down. I prefer to zig zag this as it stretches a bit more when its pulled over the head.  The zig zag allows for a bit of stretching where a straight stitch may break.

5.  Bunch the top about 3-4" from top of hat.  Lay strip of fleece under hat.  

6.  Tie strip in knot--double knot this.  


7.  Cut fringes 1" wide.  Trim strip to same length as fringes.  Voila, your hat is finished.  Push the "easy" button. 

Repeat and share the hat love!


Thursday, September 8, 2011

Back to Life, Back to Reality...

....and Back to School!  The first day of school was always so much fun for me as a kid.  I loved school and all the fresh notebooks to doodle on, sharp pencils and erasers, new shoes without scuff marks on them, new teachers and old friends.  What's not to love?!  Today I dropped off my 2nd grader at school.  Its a pretty exciting day, even if he wouldn't admit it. As a 2nd grader, this "first day of school" stuff is old hat.  He posed for a picture, just for his momma.  How sweet!  As we were dropping him off, we had to swerve around all the other parents trying to get first-day-of-school pictures.  Maybe its a bigger deal for the parents than the kids?! My baby starts preschool tomorrow, it's his last year of preschool.  I'll process that later. I'm happy and sad all at the same time if that makes any sense....
 

We are back into routine and parts of that are sure are nice.  Its great to have a schedule and be able to count on things being the same for awhile.  After moving and starting a new job, routine sounds just splendid!

In honor of all our kids going back to school I have a special promo in my shop.  FREE SHIPPING!  Yes you read that right, free shipping on all domestic orders with the promo code BACK2SCHOOLSHIP, now thru Sunday night, 9/11/11.  

In closing, in honor of back to school, I organized the shoes in our entryway closet.  Adding a shelf to put them on made all the difference in the world.  Here's to getting organized one drawer, room or closet at a time.  What are you organizing today?

Friday, June 17, 2011

We Moved!


Here is the new place we are calling "home".  I'm enamored with the brick exterior, the timeless classic pillars (which are around the corner on the front) and the simple beauty of this house.   And of course, the screened in porch!  Living in Minnesota where our state bird is the mosquito, screened in porches are a must for delightful outdoor dining in the the summer months.  We have enjoyed many outdoor meals in it already, rain or shine.  Score!

I'm looking forward to sharing the transformations we are making to the inside and outside.  Huz just got a new blade for his chainsaw so watch for flying branches!  What home improvement projects are you working on this summer?  I'd love to hear about them!  I'm tackling wall paper removal next.  Before and after pictures are coming soon. 

Ahmelie

Saturday, May 7, 2011

Showering like a Pro!


I just love a good party and last weekend I was able to host a baby shower.  Half the fun is in the planning, the coordinating and the making, don't you think?!  This was a shower for a two co-workers so we did a couples shower and none of the guys walked out early so the food must have been up to par.  I mean that's pretty much the only reason the guys come, right?  That, and carrying the stuff out to the car, right ladies? 
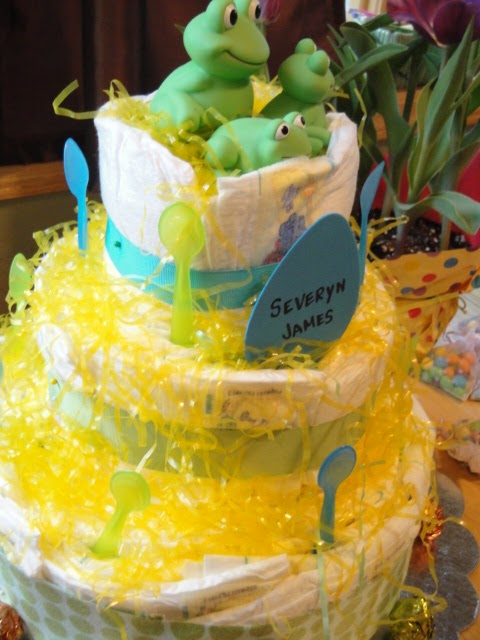
This shower was for a baby boy, Severyn James and an unborn boy or girl (the parent's decided not to find out which I find extremely cool and not the norm-- such rule breakers!)  
Does the topping look familiar? YES, I rescued Easter basket grass and repurposed it for a little fancy fun on these diaper cakes.  The silver base is a cardboard cake plate I picked up at our local party supply store.  I built the entire thing around a roll of paper towels.  I used a round paper "loop" as a template to build each layer in.  Next, layered the diapers (size one) in a circle, tipped on their side.  Once it was packed tight I wrapped fabric and ribbon around the layers.  I topped it off with decorative fill and embellished with goodies for the new baby and parents.  I chose spoons, stuffed animals and bath toys.


This was a brunch shower so the menu included:
Egg Bake, 1 with bacon and a bread base and 1 with sausage and a hashbrown base
Yogurt & Fruit Parfaits
Donut Hole Flowers
Assortment of Breakfast Breads
Cupcakes
Trailmix
Citrus Punch


Here are a few other pictures of the fun!
Cupcake toppers are a toothpick sandwiched between "new baby" stickers.  They were super easy to do and saved me about $4 from store bought toppers.  Plus I like to make my own.  
Here are the donut flowers.  I set donut holes in a mini cupcake paper and speared them with a wooden skewer.  A ribbon tied about 1.5" from the top of the stem kept them from sliding down the stick.  The ribbon could look like leaves if you make them green.  This was easy enough for huz to assemble right before the shower started.  And see my punch bowl in the background?  I was stoked that I got to use this before we packed it away for our move.
Last but not least was the banner that I hung over the breakfast nook.  This was a DIY specialty with my Sizzix Big Shot Pro.  It was a snap to crank out and took about 10 minutes to assemble.  Just layer the triangles and thread a 3/8" grosgrain ribbon thru the punched holes.  That's a baby shower in a snap.  Congrats to the two sets of parents, I'm so happy for you!

Thursday, May 5, 2011

Oh Sweet Momma--Amy Butler Sweet Life Bag Giveaway!

 Do you love a great looking handbag with lots of pockets for all your goodies? I absolutely adore this Amy Butler Diana Sling Bag. First off, could the fabric be any cuter?  Second, I love the size, not too big and not too small. Take a peek at all the places to store a glossy chapstick, your cell phone and your sunglasses inside!  Nice and handy so you don't have to always dig for those small things on the bottom of your bag.

Not only does it have these great pockets, it has a divider in the center to keep your important items zipped securely away.  To celebrate moms and my appreciation of my own sweet momma, I'm giving away one of these Sweet Life Bags to one lucky winner.  To enter this giveaway steps 1 and 2 are mandatory, the others give you extra chances to win, leave a comment for each one:
1. Follow my Blog
2. Go to www.ahmelie.com and sign up for my newsletter
3. Follow me on Twitter
4. Like me on Facebook

The drawing will take place on Monday, 5/9/11.


Want one now?  You're in luck!  Step on over to the store and choose from these 3 great color choices!
Get 15% off any Amy Butler Sweet Life Bag with promo code SWEETLIFE15 now thru Momma's Day!  Now go show your sweet momma some lovin'!
-----------------------------------------------------------------------------------------------------
And the winner is entry #6!  Congrats and thanks to all the entrants!

Sunday, April 24, 2011

Egg Salad Surprise Sandwiches

Need a twist on the traditional post-Easter egg salad sandwich?  Try this recipe to use up all those leftover hardboiled eggs the kids had a blast decorating.  

A little food coloring never hurt anyone right?  Shell the eggs and rinse.  


Egg Salad Surprise
12 Hardboiled eggs
3 t dijon mustard
3 T Mayo
Shredded Lettuce
1/3 c. shredded cheddar cheese
1/4 c. diced red onion


Mash 3-4 eggs, add dijon mustard, mayo.  Stir.  Dice eggs into bite size pieces.  Mix eggs, lettuce, onions, cheese and mashed mixture.  Spread on sandwiches. Serves 6.  Enjoy!