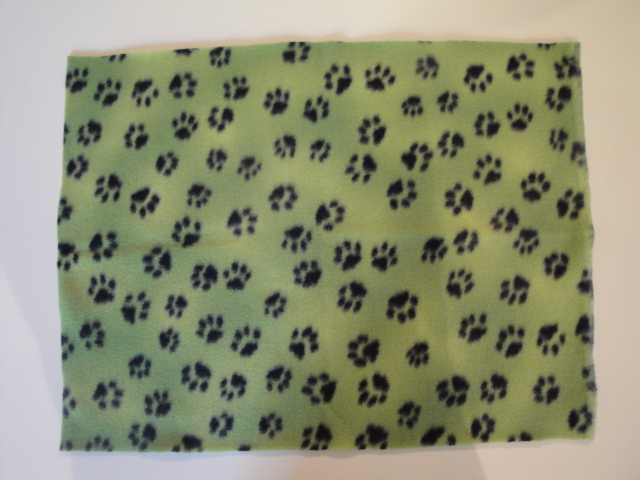
Today is "Be The Change Day" over at The Shine Project. The challenge for today was to be the change you want to see in the world. Today I bought a sewing machine! It was so exciting. I have no idea what kind it is. I don't know what bells and whistles it has, or what color it is or if it comes with a ruffle attachment (which is my new favorite toy on my own sweet machine!) Its a sewing machine I'll never see. Why? Because its going to a girl somewhere in a country I will probably never set foot on. It is going to help change her life. It is going to give her hope and a future. I have partnered with World Vision to give a girl a sewing machine and lessons to learn how to sew. In doing this, she will have a way to provide for her family which most likely currently lives in extreme poverty right now.
I wish I could hop in the box so I could hear her squeal like a child on Christmas morning when she opens it. I'd love to see the look on her face when she finds out she can do something to help her family. I wonder what she will sew first. I wish I could include a big batch of scraps from my mountainous scrap pile. Now that would be FUN!
THANK YOU! I could not have done this without the support of my faithful customers. This was something that was made possible by YOU! Thank you for your support of my sewing shop. You have touched my life and now you have touched the life of a complete stranger. Doesn't that just make you smile? Do you have your own "Be The Change" story? Please share it on Twitter with the hash tag #bethechange or post below. I can't wait to hear how others have taken the step to "Be The Change" you want to see in the world.
Tuesday, January 31, 2012
Sunday, January 29, 2012
De-Stashing My Stash {February Fabric Challenge}
I come to a 4 way stop. There are 3 other cars at each of the other stop signs. I look to the right, cause that driver has the right of way, and they wave me to go ahead. The politically correct "Minnesota nice" thing to do would be to wave back at them to go ahead and proceed first. However my typical response is to hit the gas when anyone hesitates at a stop sign. Its not because I'm not nice, its 'cause I'm not patient. I mean wouldn't we all be happier to continue on our way versus sit there and wave to other drivers to go ahead of us?
Speaking of patience, I'm going to do something in February that will dramatically try my patience--or addiction, my fabric addiction that is. I'm going to attempt to go a whole month (note I picked the shortest month of the year) to go without buying any fabric. Oofta! Who wants to join me? I may need a support group to help me thru the month. Cue the happy music--see Huz skipping joyfully across a meadow. He's ecstatic over this goal I've set.
So, February is the month! I'm going to use what I have, de-stash my stash. I'm looking forward to using up all my scraps, or at least a lot of them, and spending time in the studio cleaning out and organizing. After moving last summer, I was reacquainted with so many totes of gorgeous fabric, that I probably collected years ago when I worked at Joann Fabrics. The only way I'll ever "dig out" is to make a conscious effort to not acquire more for a little while. I think a month should give me the time I need to make a dent in the mounting pile of scrap-dom, yes there is small mountain of it!
So, just to set the stage for the February Fabric Challenge, I wanted to share this awesome quilt that someone made with scraps from my studio.
A lady from church told me her mom was coming to visit and was wondering if I had any fabric scraps for her to sew on. Do I? Um, hello, I'm a fabric addict! So I was super excited to dump a bag of scraps on her and her unsuspecting mom. Well, much to my surprise, she made me a quilt out of them. Whaaaat?
First of all, that takes an incredible amount of time (and patience) and also hand cutting. Check out this great block. Love the colors! Have I mentioned I adore patchwork? *sigh*
Speaking of patience, I'm going to do something in February that will dramatically try my patience--or addiction, my fabric addiction that is. I'm going to attempt to go a whole month (note I picked the shortest month of the year) to go without buying any fabric. Oofta! Who wants to join me? I may need a support group to help me thru the month. Cue the happy music--see Huz skipping joyfully across a meadow. He's ecstatic over this goal I've set.
So, February is the month! I'm going to use what I have, de-stash my stash. I'm looking forward to using up all my scraps, or at least a lot of them, and spending time in the studio cleaning out and organizing. After moving last summer, I was reacquainted with so many totes of gorgeous fabric, that I probably collected years ago when I worked at Joann Fabrics. The only way I'll ever "dig out" is to make a conscious effort to not acquire more for a little while. I think a month should give me the time I need to make a dent in the mounting pile of scrap-dom, yes there is small mountain of it!
So, just to set the stage for the February Fabric Challenge, I wanted to share this awesome quilt that someone made with scraps from my studio.
A lady from church told me her mom was coming to visit and was wondering if I had any fabric scraps for her to sew on. Do I? Um, hello, I'm a fabric addict! So I was super excited to dump a bag of scraps on her and her unsuspecting mom. Well, much to my surprise, she made me a quilt out of them. Whaaaat?
First of all, that takes an incredible amount of time (and patience) and also hand cutting. Check out this great block. Love the colors! Have I mentioned I adore patchwork? *sigh*
And this one...the mushroom print makes me smile. And look at all that hand cutting, yes I know I just said this. Its cause I rarely do it. My style of quilt is usually termed, Quilt in a Day, or Easy, or Quick. That is not the case with this quilt. I'm in awe that she would make this and then give it away. Its truly a work of art! Ok, enough of the drooling. So I'm inspired to go start using up my scraps. What is your favorite project to use up scraps? I'd love to add them to my pinterest board. Well, here's to a month of patience, self-control and maybe a little more Minnesota Nice!
Friday, January 20, 2012
Superhero Suckers {A Valentine Tutorial}
Below are step by step instructions on how we made these--enjoy!
{Supplies}
Scrapbooking paper
Tootsie Roll Pop Suckers
Paper hole Punch
Scissors
Sharpie Marker
Glue
Spaghetti Strainer
1. Cut scrapbooking paper into 2"x 3" rectangles. I used my fiskars paper cutter and can do several sheets at a time. These were done in a snap!
2. Round corners on back and front. I took a little more off the front than the back. Punch hole on front in the center.
3. Write your love note on the cape. If you're 5 this can be a heart instead of words.
4. Cut mask rectangle 4"x 1/2". Color two little eye slots with a black sharpie marker in the center.
5. Glue mask to sucker. I glued the mask into a circle and also glued it to the sucker wrapper so it wouldn't slip. Don't you just love the preschooler handwriting?!
6. Slide cape up the sucker stick. It must go on top of the wrapper to stay in place. I stuck mine in a spaghetti strainer to hold the finished Valentine's!
Hand out the super love! XOXOXO
Thursday, January 5, 2012
With All the Trimmings
We'll take it with all the trimmings. I'm pretty sure this was what Huz and I said when we bought this place. Unfortunately, when it comes to home ownership, we don't get to order off the menu and have it brought to us on a platter, do we? Owning a home is not always as easy as opening a box of Annie's organic mac & cheese. Actually its never that easy. The "honey-do" list can get quite long once you move in and realize that the water heater didn't have the right valve on it to switch over from propane to natural gas. Or that the countertop in the master bath, with only one sink, is a unique size and will require a custom order (cha-ching!) to replace it. Minor setback. The returns though....you gotta love it when you can see your hard work paying off! Huz and I have been working hard on our new little love nest and project by project are starting to make it feel more like our own. We are excited to share these updates with you even if they didn't happen as quickly as we would have liked....
Here is what the walk-out side of our house looked like when we purchased it in June 2011. Decent looking for sure, right? Livable and certainly good enough to enjoy the view from the beach for the summer. We had a lot of outdoor projects to work on this year so we had to be choosy about which ones to work on. Clearing overgrown brush next to the lake was a must! We seriously spent 3 months working on this. Our beach has a steep bank, so hauling the branches up and out was a full body workout! Did I mention we don't have steps? We'd work on it til we got a rash from either poison oak or ivy, (or maybe something else, we really never identified the culprit) and then we'd let it sit for a couple days and start up again once our "irritaions" had subsided. We learned to put on gloves and wear long pants and long-sleeved shirts after only a few times of getting these itchy skin irritations. What a good idea even if it meant you were bathing in your own sweat in 30 seconds!
In August we got a new septic system so our yard got ripped up on the right side of the walk-out to remove the old septic system. A new one was put in over by the garage. We are hoping the new grass--that we babied by watering it 4 times a day during our 80* weather in October--will have good enough roots to come back this spring. Note, it was not 80* until the grass seed was down and it was wet. Then it suddenly got hot. Can someone give me an "oof-da!"
Here is what a little paint with all the trimmings and Huz with a tall ladder can accomplish. I love the way the white paint pops against the red brick. And you? I've been waiting to take this picture til we had a light dusting of snow. Perfect timing, don't you think?
Labels:
decorating,
DIY,
makeover,
paint,
trim
Posted by
Ahmelie.com
2
comments
Saturday, November 5, 2011
Homemade Babycakes, Betchya Can't Eat Just One...
If your kids are anything like mine you find it very hard to enter they bakery at the grocery store without leaving with some donuts in the cart. Typical? Yes, good. I'm glad to know I'm not the only mom who caves in so we don't have a major meltdown between the cupcakes and the artisan bread isle. I always opt for the donut holes so at least if I have to give in, it's a smaller serving of sugar. A nice compromise if you ask me.
So....I was super jazzed when I saw this new babycakes product at my local department store.
{Yes I'm thinking, I can put whole wheat flour in these puppies and cut some of the sugar and the kids will never know!} So I picked one up with my coupon that I got for donating clothing. What a win/win. I give them clothes that no longer fit my kids and they give me coupons. This is dream shopping cause I just de-stashed the closets at home {huz will be so happy} and get new fun goodness on sale {huz is not as happy about bringing stuff home, but you can't win them all, right?} Yay for me, I say!
So Owen was very excited to try them out. He helped me mix up the batter. We chose the Vanilla Cake Pops recipe:
1.5 cups all-purpose flour {this is where I substitute 1/3-1/2 cup for whole wheat flour, couldn't even tell so I might try more next time}
1 teaspoon baking powder
1/4 teaspoon salt
1/2 cup butter, softened
1 cup sugar {I used powdered sugar and skimped on it a bit}
2 eggs
2 teaspoons vanilla
1/2 cup milk
Cinnamon and Sugar for coating
Directions:
1. Combine flour, baking powder and salt. Set aside.
2. In a separate bowl, beat together butter and sugar until light and creamy. Beat in eggs and vanilla.
3. Alternately blend in flour mixture and milk into butter mixture, beginning and ending with the flour mixture.
4. fill each cooking reservoir with about 1 tablespoon of batter. {My pampered chef scooper worked great for this so my fingers didn't get so messy}
5. Bake 4-5 minutes or until a toothpick inserted into a cake pop comes out clean.
6. Allow to cool and glaze or coat, as desired.
Owen manned the baker under my supervision. I filled the reservoir with batter and he took them out with the fork tool when they were done. {If you fill them too full they will come out looking a little bit like planets with rings around them.} We opted to roll ours in cinnamon and sugar. Here is a picture of the finished product. It'll be our little secret how good they actually are for you, right?
Thursday, October 20, 2011
Fa-la-la-la-la Fa-leece Hats for the Holidays
Tis the season to break out hats and mittens and start thinking about stocking stuffers and Christmas gifts! This tutorial should help cross a few of the nice people off your list. Follow these easy directions below:
1. Cut a piece of polar fleece approximately 1/2" bigger than head measurement in width, by 16"-18" tall depending on how long you like your fringe. Don't worry, if it's too long you can always trim it later.
2. Cut one 1" by 10" strip, set aside.
3. Fold fleece in half width-wise and stitch 1/2" seam allowance all the way from the top to the bottom of the hat lengthwise. Don't forget to backstitch at the top and the bottom.
4. Turn bottom edge up 2.5". Pin, stitch edge down. I prefer to zig zag this as it stretches a bit more when its pulled over the head. The zig zag allows for a bit of stretching where a straight stitch may break.
5. Bunch the top about 3-4" from top of hat. Lay strip of fleece under hat.
6. Tie strip in knot--double knot this.
7. Cut fringes 1" wide. Trim strip to same length as fringes. Voila, your hat is finished. Push the "easy" button.
Repeat and share the hat love!
Thursday, September 8, 2011
Back to Life, Back to Reality...
....and Back to School! The first day of school was always so much fun for me as a kid. I loved school and all the fresh notebooks to doodle on, sharp pencils and erasers, new shoes without scuff marks on them, new teachers and old friends. What's not to love?! Today I dropped off my 2nd grader at school. Its a pretty exciting day, even if he wouldn't admit it. As a 2nd grader, this "first day of school" stuff is old hat. He posed for a picture, just for his momma. How sweet! As we were dropping him off, we had to swerve around all the other parents trying to get first-day-of-school pictures. Maybe its a bigger deal for the parents than the kids?! My baby starts preschool tomorrow, it's his last year of preschool. I'll process that later. I'm happy and sad all at the same time if that makes any sense....
In honor of all our kids going back to school I have a special promo in my shop. FREE SHIPPING! Yes you read that right, free shipping on all domestic orders with the promo code BACK2SCHOOLSHIP, now thru Sunday night, 9/11/11.
In closing, in honor of back to school, I organized the shoes in our entryway closet. Adding a shelf to put them on made all the difference in the world. Here's to getting organized one drawer, room or closet at a time. What are you organizing today?
Subscribe to:
Posts (Atom)