Now how in the world do you make a t-shirt look this good? Watch this video to make your own in just minutes!
Now how many of you just ran to your closet to see which of huz' tee's would look good around your neck? Have fun with this one and post any of your creative embellishments!
Smiles!

Monday, February 28, 2011
Wednesday, February 16, 2011
Go Green with a Foo-Foo Smoothie

Here is my latest smoothie favorite. I substitute romaine lettuce for spinach if I don't have spinach in the house. Garnish with mint leaves or a strawberry to make it foo-foo. This is low cal yet, filling and is great for you. If you substitute this for one meal a day, you should also feel more energized and less sluggish. Oh, and my Vitamix pretty much rocks! :)
Going Green Smoothie
|
| 1 cup (160 g) green grapes |
| 1/2 cup (78 g) pineapple |
| 2 cups (60 g) fresh spinach |
| 1/2 ripe banana, peeled |
| 1/2 cup (120 ml) water |
| 1 cup (240 ml) ice cubes |
| 1. Place all ingredients into the Vitamix container in the order listed and secure lid. 2. Select Variable 1. 3. Turn machine on and quickly increase speed to Variable 10, then to High. 4. Blend for 60 seconds or until desired consistency is reached. Serve immediately. |
| Health Classification: Diabetic Friendly, Low Fat, Low Sodium, Low Cholesterol, Heart Healthy, Vegetarian, Vegan, Raw |
| Meal Type: Green Smoothies, Beverages |
Saturday, February 5, 2011
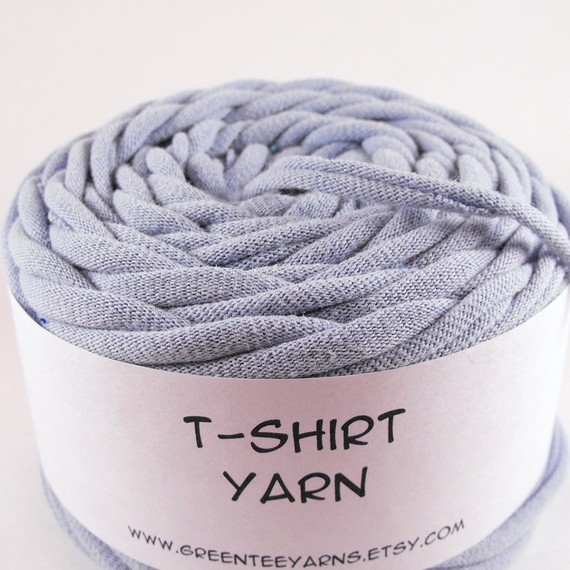
Upcycled Cotton Yarn
Look at this great find I stumbled across. Upcycled t-shirt yarn! I love finding unique ways to reuse cast offs that may have served their useful purpose, but still have life. This cute little shop on etsy, located in Milwaukee, Wisconsin called Green Tee Yarns, has done just that! What a creative and eco-friendly way to keep t-shirts out of our landfills. This yarn has great texture and is 100% cotton so it won't get pilly. I'm sitting here wishing I had better crochet or knitting skills. See this sweet color, burnt orange. Are you lovin' it like me?!

Burnt Orange
Here are a couple other colors from the shop:

Rainbow Candy
Dusty Blue

I'm just giddy to see something made out of this. Do I have any knitting or crochet followers out there willing to give it a try? Shoot me a note and I'll buy the first skein!
Wednesday, February 2, 2011
Heather Bailey Treats & Trinkets Pattern

Have you seen this little bit of sweetness that Heather Bailey just released today? Not only can you put a cupcake in it, you can get it for free! I love free patterns to try out.

7” x 7” fabric*
7” x 7” lining fabric*
3/4 yd narrow piping
1 1/3 yd ribbon, 1/8” wide
8” x 10” stiff, thin cardboard
Thread
7” x 7” lining fabric*
3/4 yd narrow piping
1 1/3 yd ribbon, 1/8” wide
8” x 10” stiff, thin cardboard
Thread
HELPFUL TOOLS
Pins, scissors, needle, liquid seam sealant (such a s Fray Check™)
Pins, scissors, needle, liquid seam sealant (such a s Fray Check™)
* Suitable fabrics include laminated cotton, quilting-weight cotton, light-weight decorator fabric, and other light to medium-weight woven fabrics
INSTRUCTIONS (click on illustrations to enlarge)
A. Cut Out Fabric & Cardboard – Click here to download pattern pieces. Using pattern, cut one 5 7/8” square of fabric and one 5 7/8” square of lining fabric. Round corners per pattern & clip at circles to mark ribbon placement. Of cardboard, cut one 3” square, and cut four 1” x 3” rectangles. If cardboard is flimsy, cut two sets & glue corresponding pieces together to stiffen.
C. Attach Ribbon Ties – Cut eight pieces of ribbon, each 6” long. With a small stitch-length, sew one ribbon to tray at each black circle, on top of piping; stitch back & forth across ribbon to secure well.
D. Sew Lining to Exterior – With right-sides-together, pin lining to exterior. Sew around tray, leaving one side open between black circles. Notch curve at each corner. Turn tray right-side-out through opening in seam.
E. Insert Cardboard & Stitch Around Sides – Insert one rectangular cardboard piece into tray; butt cardboard up to stitching at side of tray opposite from opening, beneath the seam allowance on exterior side of tray. Secure cardboard in place by stitching 1 1/8” away from fabric edge (not piping edge) along stitching line shown on tray pattern, beginning & ending at black circles. See illustration. Be sure stitching runs alongside cardboard & does not go through it & ribbons are not caught in seam. Insert another cardboard rectangle at one adjacent side & stitch as before. Repeat at opposite side of tray. Slide cardboard square into place at center of tray & stitch along last stitching line, parallel to opening. Insert last cardboard rectangle into opening. Fold tray lining edge under 1/4” & ladder-stitch to close opening in seam.
F. Tie Corner Bows & Trim – Fold sides up & hold corners together with a pin. Tie two ribbons at each corner into a bow. Once tied, trim ribbons to desired lengths. Finish ribbon ends with liquid seam sealant to prevent fraying.
ENJOY!

Now go bake some cupcakes. :)
Subscribe to:
Posts (Atom)